in Danish
Do you want to perform advanced AI/ML analytics in Python on your website analytics data? Google doesn’t provide tools for this, so you need to extract all the data in order to proceed. The problem is Google won’t let you do that either. At least not in full. Google will gladly deliver sampled data exports for you. But you don’t need samples. You need the lot. Here’s how to get it – using Python for the exports.
Before heading on you need to do two things: First (if you haven’t done so already) you’ll need to enrich your Google Analytics data with a Client ID and a timestamp as described in chapter 2. This will allow you to run ML/AI-algorithms on the data once it’s extracted.
Next download Python, Anaconda and Pycharm (from python.org, anaconda.com and jetbrains.com/pycharm respectively) and install obligatory packages in the Anaconda Prompt with the following commands.

Combined, the above downloads and installations enable Python to connect to the Google Analytics API once a connection has been established (we’ll get to this in the next section). Furthermore, PyCharm provides an appealing integrated development environment to structure scripts into separate interconnected files. In this blogpost PyCharm is used to structure the workflow.
Create a project in PyCharm
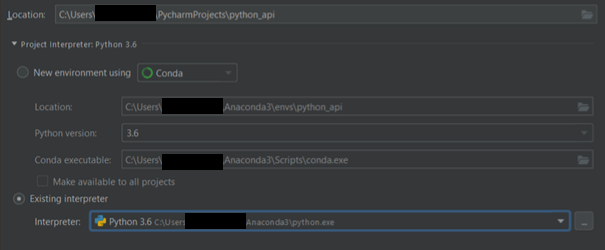
To get started extracting data from Google Analytics you need to create a project in PyCharm. In this blogpost the project is named “python_api” and use an existing interpreter that points towards the Anaconda directory.
The project structure in PyCharm enables the user to create separate files and linking these to the project in order to maintain an appropriate structure. Consequently, five separate files with the below naming are created.
- txt (contains the names of required installations)
- py
- py
- py
- py
With the project in PyCharm now ready to be filled in with relevant code we can now progress to setting up the API in Google Developers. This enables us to connect Python to Google Analytics.
Create project in Google Developers
In order to pull out data from Google Analytics, Python needs to be authenticated through a set of user credentials. The following provides a step by step guide.
- Navigate to https://console.developers.google.com/ (this requires access through a Google account with access to the relevant Google Analytics account).
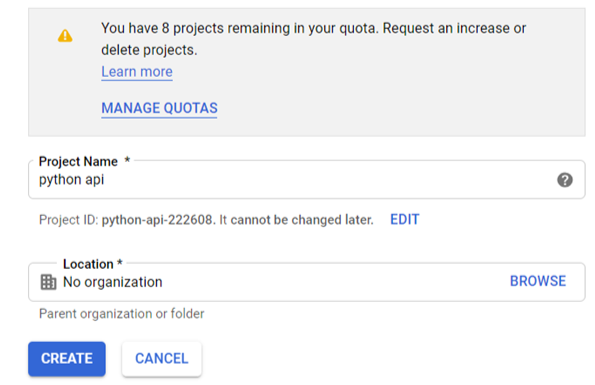
- Create a new project from the “Dashboard” menu.
- Name the project. In this blogpost the project is named “python_api” and “No organization” is chosen.
- Navigate from the left menu to “Credentials”
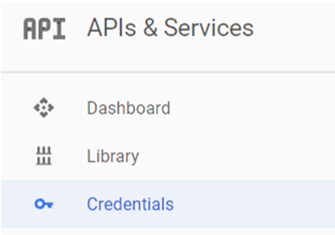
- From “Credentials” choose “OAuth consent screen”.
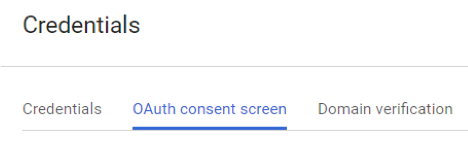
- Beneath “OAuth consent screen” the “Application name” must be filled with a relevant name. In this guide “python api” is chosen as the application name. Furthermore, an “Authorized domain” must be submitted. In this guide “ecapacity.dk” is used. Subsequently, you can save.
- From the “Credentials” view choose “Create credentials” and “OAuth client ID” must be clicked.

- Beneath “Application name” choose “Web application”. From here several fields must be filled. First submit the “Name” which in this guide is “python api”. As “Authorized JavaScript origins” this guide utilizes “http://ecapacity.dk” whereas “http://ecapacity.dk/oauth2callback” is chosen as “Authorized redirect URIs”.

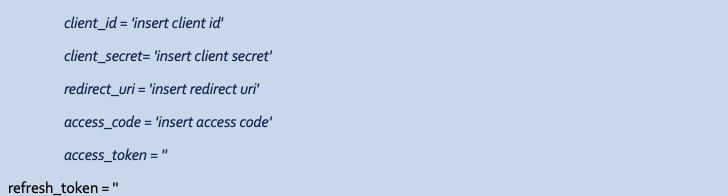
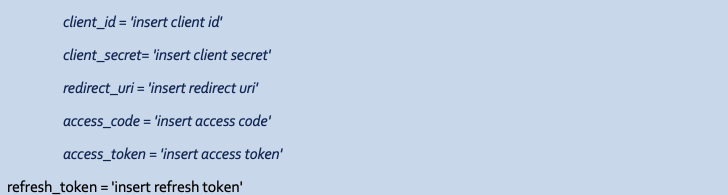
- Having clicked on create, a prompt with “client ID” and a “client secret” is returned. These are to be saved in the “credentials.py” file in PyCharm together with other information in the next part.

Connect Python to Google Analytics
We are now ready to connect Python to Google Analytics, which in turn will make us capable of querying Google Analytics data through the API. First, remember to save “client ID”, “client secret” and “redirect URI” into the credentials.py file in PyCharm.

The full code is available in our whitepaper “Google analytics, ML and AI”. You can download the whitepaper for free right here.
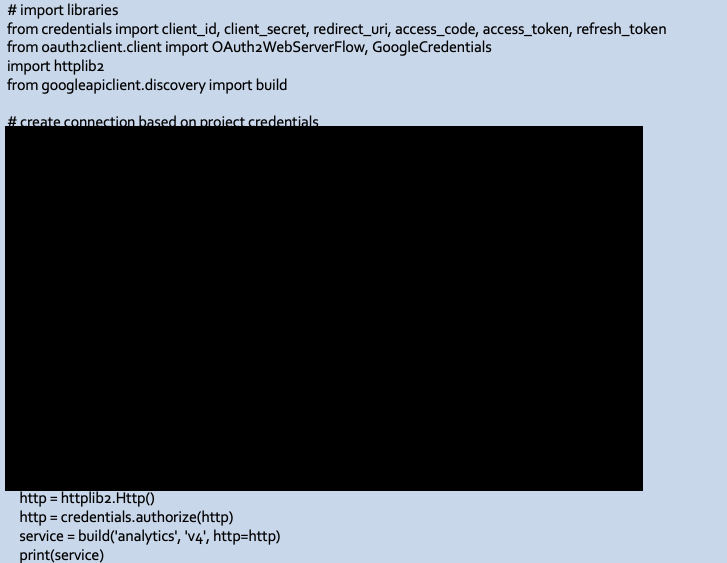
These credentials are used to establish the connection with Google Analytics in the below script which is to be pasted directly into the “connect.py” file.
The full code needed to implement the Customer ID variable in Google Tag Manager is available in our whitepaper “Google analytics, ML and AI”. You can download the whitepaper for free right here.
The next part shows how we run this code through PyCharm. Importantly, this must only be done when initially setting up the connection.
Establishing connection through PyCharm
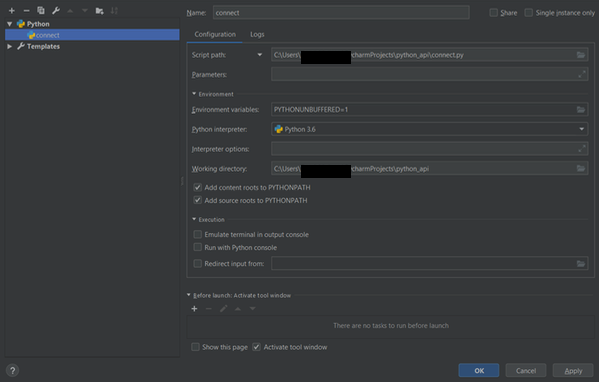
The above script and credentials allow us to establish a connection with Google Analytics for the first time. First, set up a configuration which runs the connect.py file.
After running this script, a long URL string is displayed in the console as pictured below.

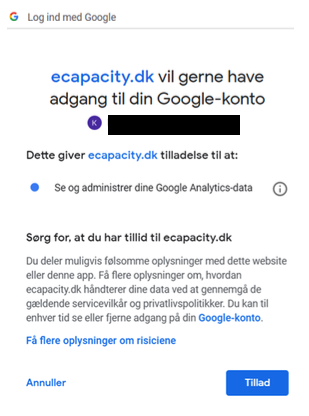
When clicking on this URL string Google prompts the user to click on a relevant account which is to be clicked on.

After clicking on the relevant account, simply give consent. This will cause a redirect to the specified “redirect URI”.
On the redirect page, copy the string available after “code=”. This is an access code which ensures that the previous steps only need to be carried out this one time. The string is inserted as the “access_code” in the “credentials.py” file.
The full code needed to implement the Customer ID variable in Google Tag Manager is available in our whitepaper “Google analytics, ML and AI”. You can download the whitepaper for free right here.
Afterwards, run the “connect.py” file once again. This provides an output in the console. The first line contains an “access_token” and the second line contains a “refresh_token”.

These are also to be pasted in the “credentials.py” file.
Run “connect.py” one last time. This secures that you won’t have to repeat the previous steps, as confirmed by the console:

Instead, looking forward, future queries are done while Python automatically connects to Google Analytics. The next part shows how data can be queried from Google Analytics entirely without sampling.
Query data from Google Analytics to Python unsampled
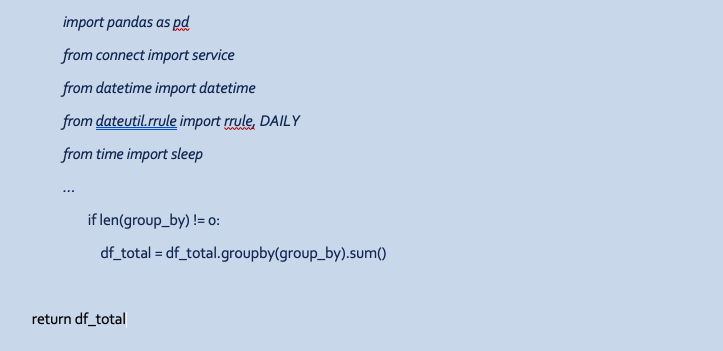
To query unsampled data from Google Analytics to Python the “functions.py” file needs to be filled. The script automatically identifies how to slice and dice the data in order to avoid sampling.
Occasionally requests violate limits set by Google in terms of the number of rows a request may contain. Later in a later blogpost I show how to bypass this limit. The blogpost is included in our whitepaper which you can download for free right here.
The full code needed to implement the Customer ID variable in Google Tag Manager is available in our whitepaper “Google analytics, ML and AI”. You can download the whitepaper for free right here.
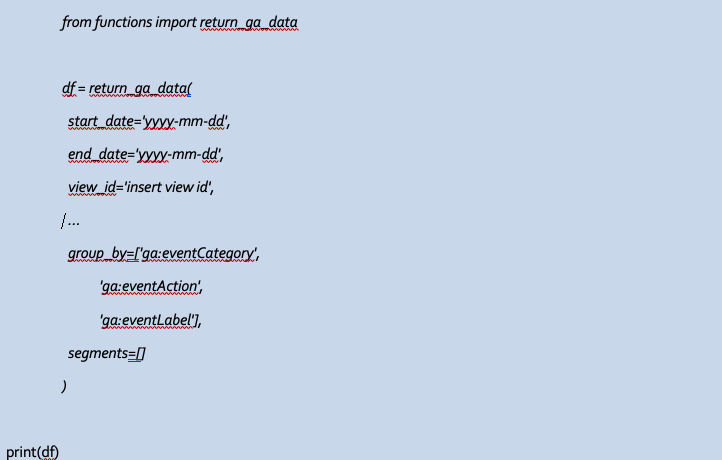
In order to utilize the above function to query the data in Google Analytics insert the below script into the “run.py” file.
The full code needed to implement the Customer ID variable in Google Tag Manager is available in our whitepaper “Google analytics, ML and AI”. You can download the whitepaper for free right here.
The above script pulls out data from Google Analytics for a predefined data range, view ID, metric and dimensions. This data does not differ significantly from the data available in the Google Analytics interface except that it is unsampled.
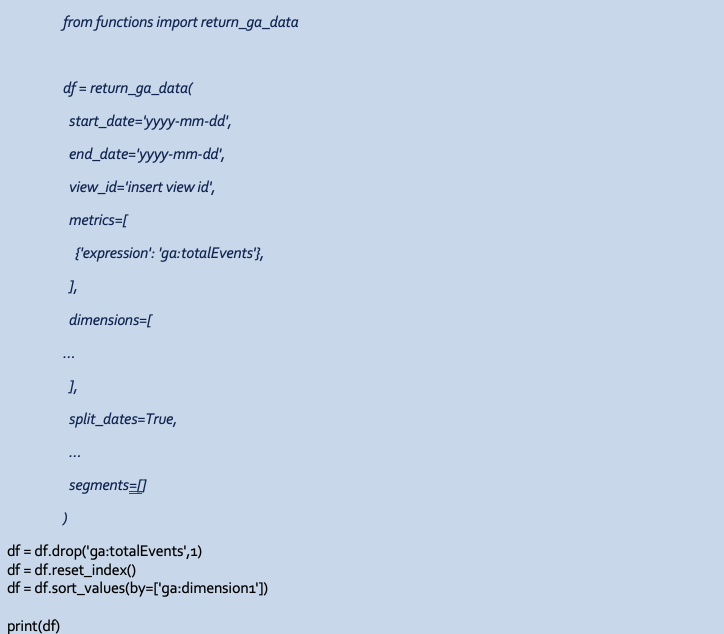
However, the above script becomes very powerful when the two custom dimensions we created comes into play. Adding these to the above request will classify it as hit level data which corresponds to every single user interaction and the timing of each interaction.
The full code needed to implement the Customer ID variable in Google Tag Manager is available in our whitepaper “Google analytics, ML and AI”. You can download the whitepaper for free right here.
Interestingly, the above script make s the event metric completely obsolete considering that each row represents every single event. Consequently, a few lines of code are added to exclude the metric column. Where custom dimension 1 represents the client ID, custom dimension 2 represent the time stamp.
Save to excel (or .csv)
That’s it! By now you’ve managed to extract all your precious GA data for ML/AI purposes. With unsampled, hit level-style data with User IDs and the lot, you’re now able to make predictions instead of reporting backwards in time. You’ve opened new avenues of research, predicting e.g. churn or conversions and even – if you’re able to grasp a user ID upon login – allowing for online analytics data to be combined with CRM data, gaining even more understanding of each and every customer.
A final tip: I like doing a little initial data exploration in Excel before bringing in the cavalry. To write data frames in Excel spreadsheets from Python, first add the below script at the bottom of the functions.py file to create a function that writes data frames to excel.

Furthermore, add the below script to the run.py file which references to the above script.

The full code needed to implement the Customer ID variable in Google Tag Manager is available in our whitepaper “Google analytics, ML and AI”. You can download the whitepaper for free right here.
Running the run.py file now creates two excel spreadsheets in .xlsx formatting and .csv formatting.
For more information on how to access the Google API through Python, Eric Driessens post “The marketing technologist” is recommended. You can find it at
In another fine post Bill Su shows how to extract up to 9 dimensionser from the GA API.
Held og lykke med at analysere!
Extract unsampled data from Google Analytics – download whitepaper
Dette er den tredje blogpost som handler om hvordan data science gøres muligt på baggrund af dataudtræk fra den gratis version af Google Analytics. Du kan læse alle blogposts, herunder kodeeksempler og tjeklister gratis i vores whitepaper ”Google analytics, ML og AI”. The full code needed to implement the Customer ID variable in Google Tag Manager is available in our whitepaper “Google analytics, ML and AI”. You can download the whitepaper for free right here.
in Danish